The fluoro braid knot is an indispensable connector knot for today's lure angler. Using this type of knot to connect your braid to your fluorocarbon leader has many advantages and is ideal for very specific fishing situations. Here is a selection of easy-to-make fishing knots to connect your braid to a fluoroThere's a whole host of advantages and disadvantages, as well as tips on how to tie a perfect fluoro braid knot.
Our article in brief:
The fluoro braid knot is essential for lure anglers. It combines the sensitivity, the strength of the braid and the discretion of fluorocarbon
3 types of knots are recommended for connecting your braid and fluorocarbon:
- The Albright knot. Easy to make and reliable, it's the most versatile of all connection knots
- The FG node. Probably the strongest, it's ideal for exotic fishing and big bait.
- The Peixeit knot. It's very strong and easy to make, but it doesn't fit through the rings as well on larger diameters.
The choice of node depends on the type of fishing (sea or fresh water), the diameter of your wires and target species.
We recommend that you master at least two of the three nodes to adapt to different fishing situations.
Why use a fluoro braid connecting knot?
Use a fluoro braid connection knot will be able to respond to a large number of fishing situations and conditions. Everyone knows the advantages of braid and fluorocarbon taken individually. Fluorocarbon has the advantage of being virtually invisible underwater and is also highly resistant to abrasion. This combination makes it a great choice as a leader for discreet fishing to tackle predators such as pike or to fish through obstacles without fear of breaking.
Braid, on the other hand, has a unrivalled sensitivity compared with any other type of wire so you get a better feel for your lure and the bites.
Combining braid in the line body and fluorocarbon in the leader with a connecting knot brings together the best of both worlds. sensitivity, discretion and robustness.
Our selection of fluoro braid connecting knots
The albright knot: one of the best connecting knots
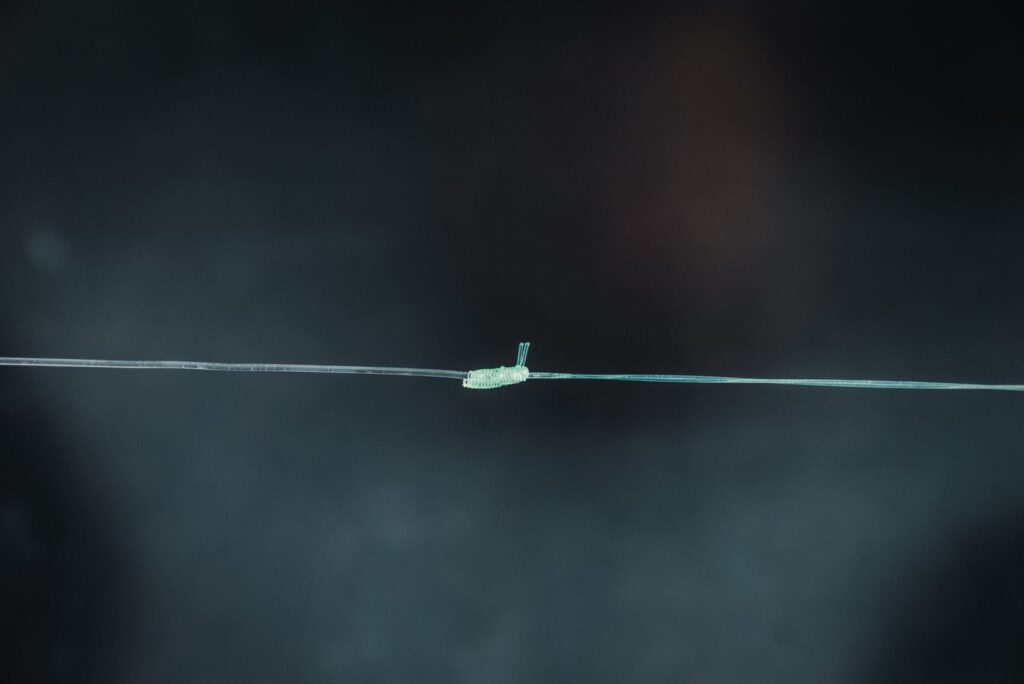
In our view, the Albright crux is one of the best fluorocarbon braid connection knots. Indeed, the latter is easy to make while being reliable and resistant over time. We've been using it for over twenty years and it has never let us down. It ideal for connecting braid and fluoro of different diameters because it is smooth and passes very well through the rings of the rod. This means there's no risk of snagging, breaking or perishing when casting.
However, note that the albright knot is sensitive to humidity. It should therefore be moistened to avoid any risk of slipping.
Here are the steps for this fluoro braid knot:
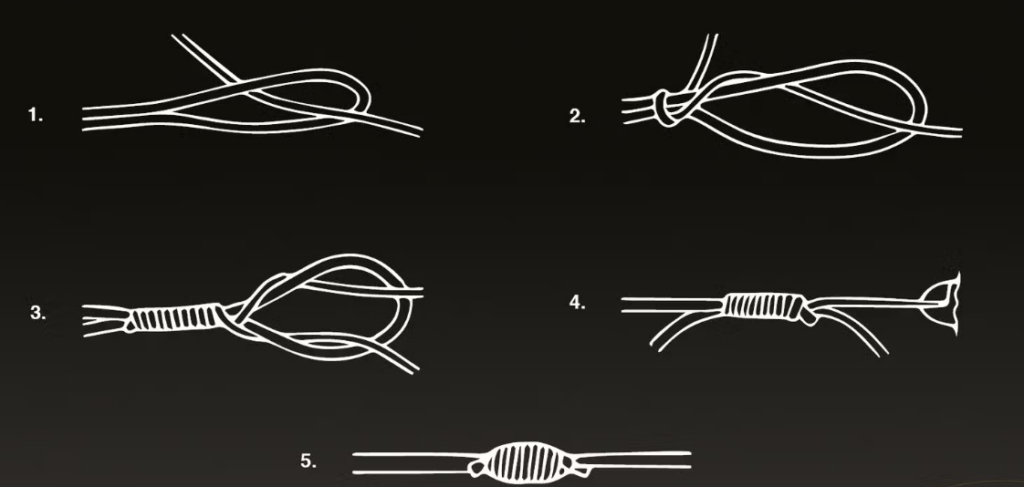
1- Take your fluoro and make a loop through which you will thread the end of your braid.
2- Take 10 to 15 cm of braid and make about 10 to 15 turns around your fluorocarbon. The number of turns depends on you and the difference in diameter between your braid and your fluorocarbon.
3- Once you've made your turns, pass the braid end back through the fluorocarbon loop, moisten and then tighten your albright knot.
4- Once the connector knot is tight, cut off the excess braid and fluoro, leaving a small piece to avoid any risk of slipping.
Here's a dedicated article for more details on this knot in photos and video: Albright knot - Steps for making an albright connecting knot
The FG knot: the perfect fluoro braid knot for exotics
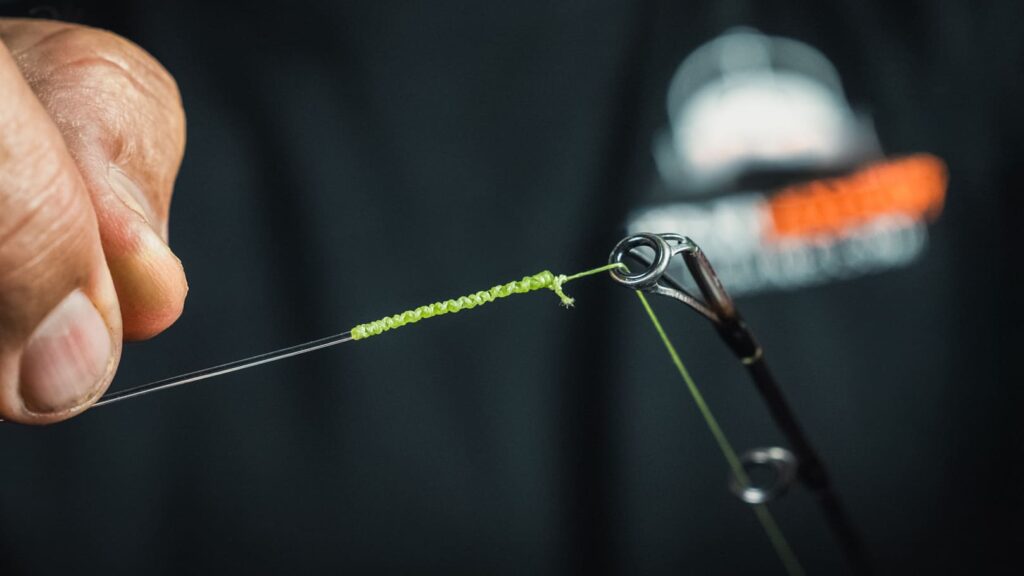
The FG node is also for us one of the best fluoro braid knots to date. The latter is undoubtedly the strongest of all knots that exist today. On top of that, it's very smooth. This knot is currently the most widely used for connecting a braid to a fluoro for exotic fishing (tuna, liche, GT trevally, etc.). It is also highly regarded for all types of strong fishing, such as big bait. On the other hand, this fishing knot is both quite complex and time-consuming at first. So it's best to make this connection knot in the peace and quiet of your own home beforehand, which isn't always easy.
Here are the steps for this fluoro braid knot
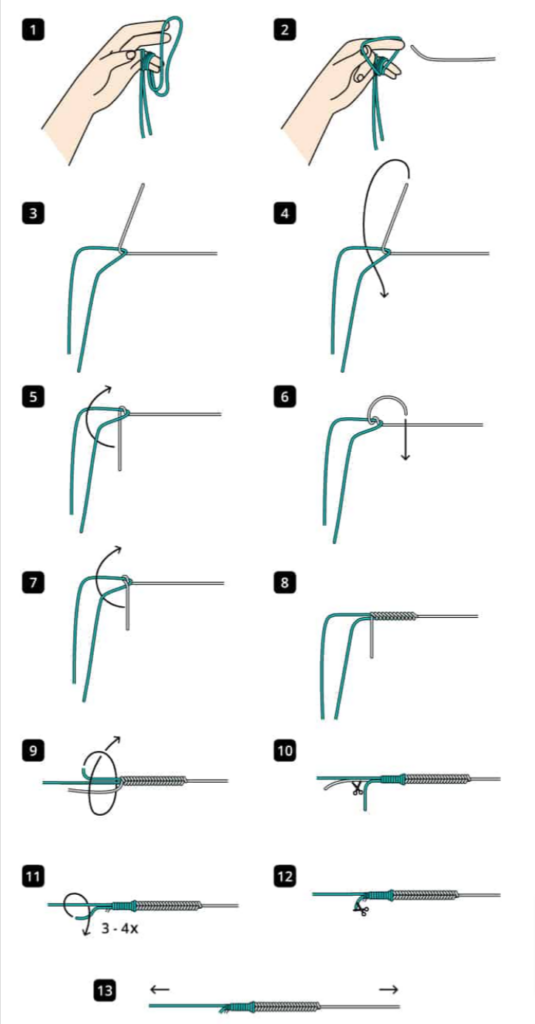
1- Take your braid and wrap it around your index finger and then your little finger. This will form a sort of bridge. Make enough turns so that the braid doesn't slip and maintains constant tension.
2- Pass your fluoro through the bridge formed between your fingers. Make a half-turn with your wrist and pass the fluoro through the bridge again.
3- Repeat the operation 10 to 20 times, alternating in one direction and then the other, until the braid no longer slips on the fluoro. Make sure you maintain constant tension during this operation.
4- With the remaining braid, make several loops around the fluorocarbon to tighten your knot.
5- Tie a knot around the fluoro with the braid and tighten to secure the connecting knot.
6- Cut the fluorocarbon, leaving a surplus
7- Make about ten loops around the braid.
8- Take a lighter and burn off the excess fluoro.
Here's a dedicated article for more details on this knot in photos and video: FG knot: How to make a perfect FG knot ?
The Peixeit knot: a perfect intermediate knot at sea
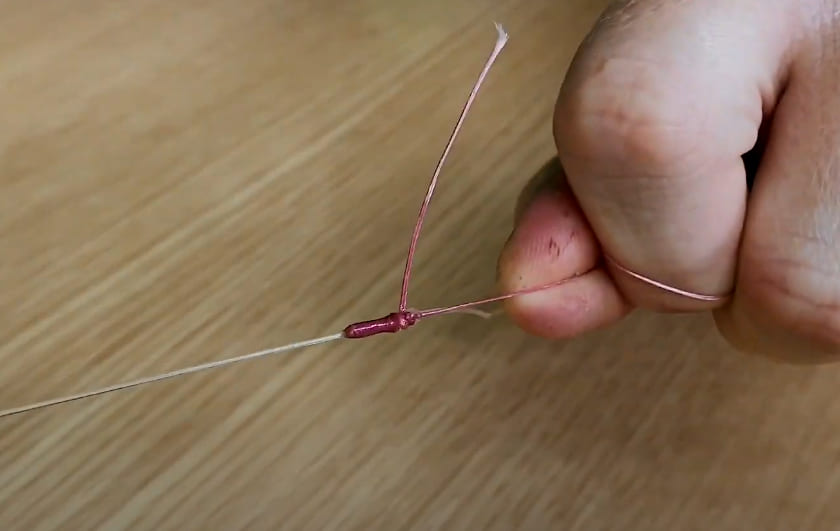
The peixeit knot is also a very good knot for connecting braid and fluoro. It is one of the strongest connecting knots and is often used at sea. The stronger the pressure on the braid, the tighter the knot becomes around the fluoro. This makes it a virtually unbreakable knot.
What's more, it's very easy to tie at home or on the water, which is a big advantage. On the other hand, it doesn't go through rings as well as an albright knot or an FG knot, especially on large diameters. We therefore recommend that you use this fluoro braid knot either on fine to intermediate diameters, or on short leaders, or if your FG knot has broken and you're too lazy to redo it (which is understandable).
Here are the steps for this fluoro braid knot:
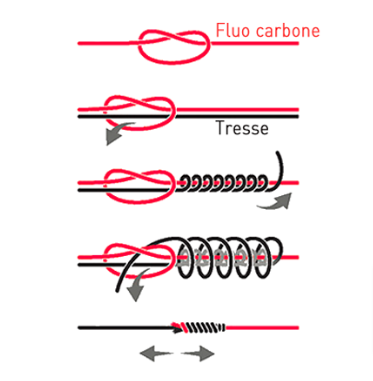
1- Take your fluoro and form a loop by tying a figure-of-eight knot. Do not tighten it at first
2- Put your braid inside this loop
3- Wrap your braid around your fluoro, making about ten turns.
4- Take the end of your braid and iron it through the fluoro loop.
5- Moisten everything and tighten your connecting knot by first taking the fluoro, then the braid. Do this several times until everything is completely tight. You can use pliers to do this.
6- Cut your excess fluoro and braid. You can use a lighter to round off the excess fluoro, taking care not to burn the braid.
Here are also the steps in video :
How do I choose the right fluoro braid knot?
When choosing your fluoro braid knot, we take the following factors into account:
- Do you fish in the sea or in freshwater?
- Do I fish with large or small lures?
- Am I looking for big predators or not?
These questions will often have an impact on the diameter of your fluoro, which in turn will affect the choice of knot.
To sum up, if you fish at sea, we recommend using the knots that are most resistant to abrasion, corrosion and the power of fish, i.e. the FG knot, or even the peixeit knot. If you're fishing freshwater, the albright knot will generally suffice and will meet a large number of needs and conditions.
If you're fishing light, your focus should be on knots that pass easily between the rings so as not to interfere with casting. In this context, we also prefer the albright knot. For heavier fishing, such as big baits or big lures, we mainly use the FG knot and if there's a break, the peixeit connector knot.
Things to remember
To sum up our method for choosing a fluoro braid knot that works in 80% of cases:
- Choose the albright knot for its ease of use
- Choose the FG knot for its solidity for heavy and exotic fishing.
- Choose the Peixeit knot for its versatility
Try to master at least two of the three braid-fluorocarbon connection knots so that you can adapt to any situation.

